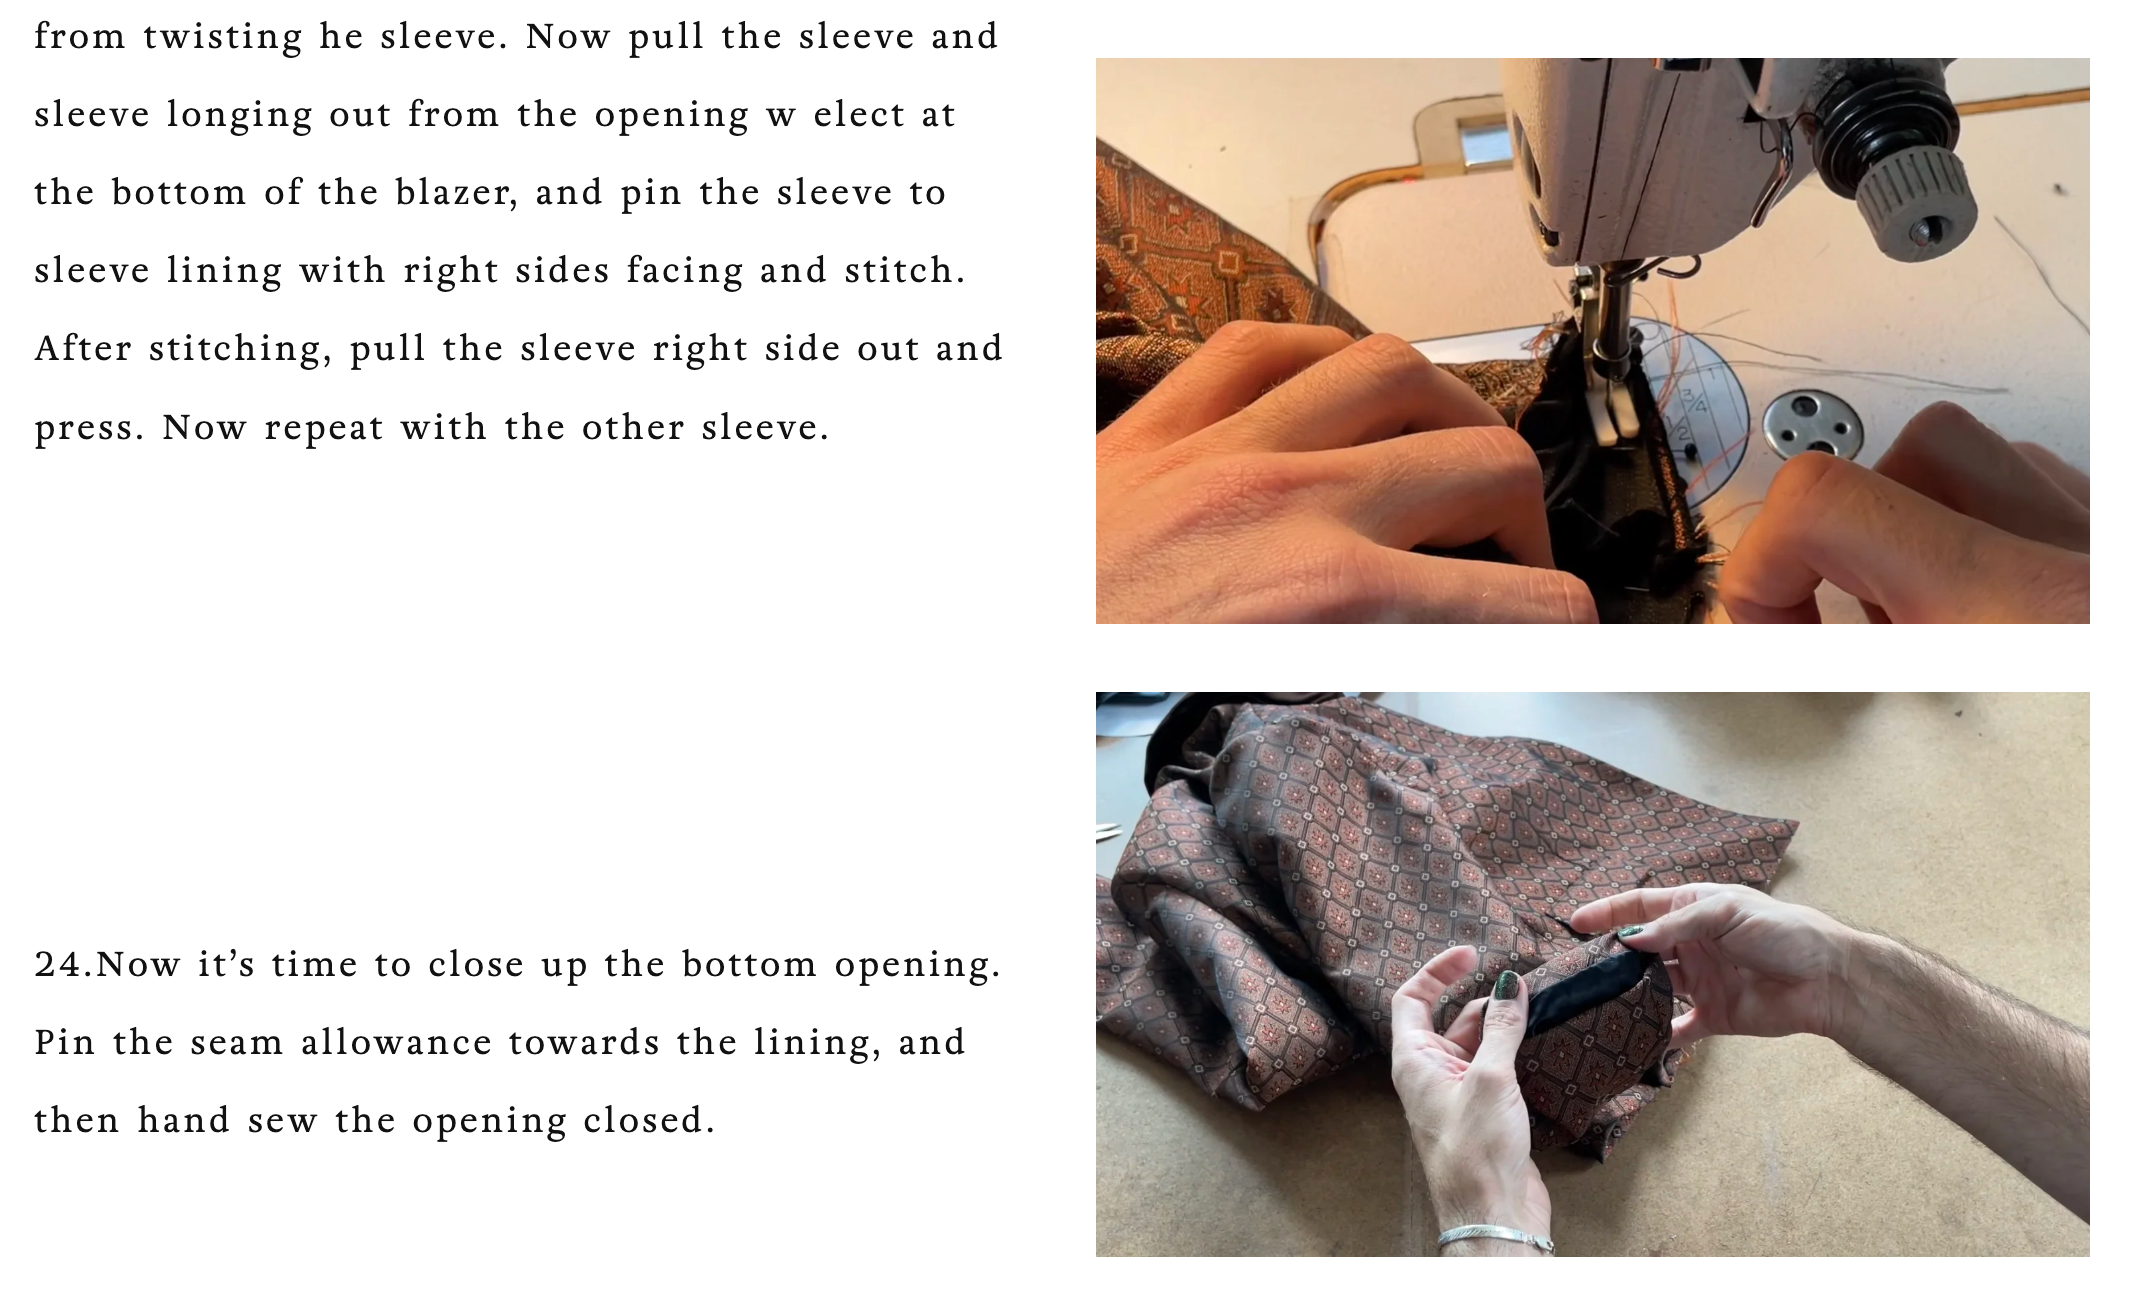
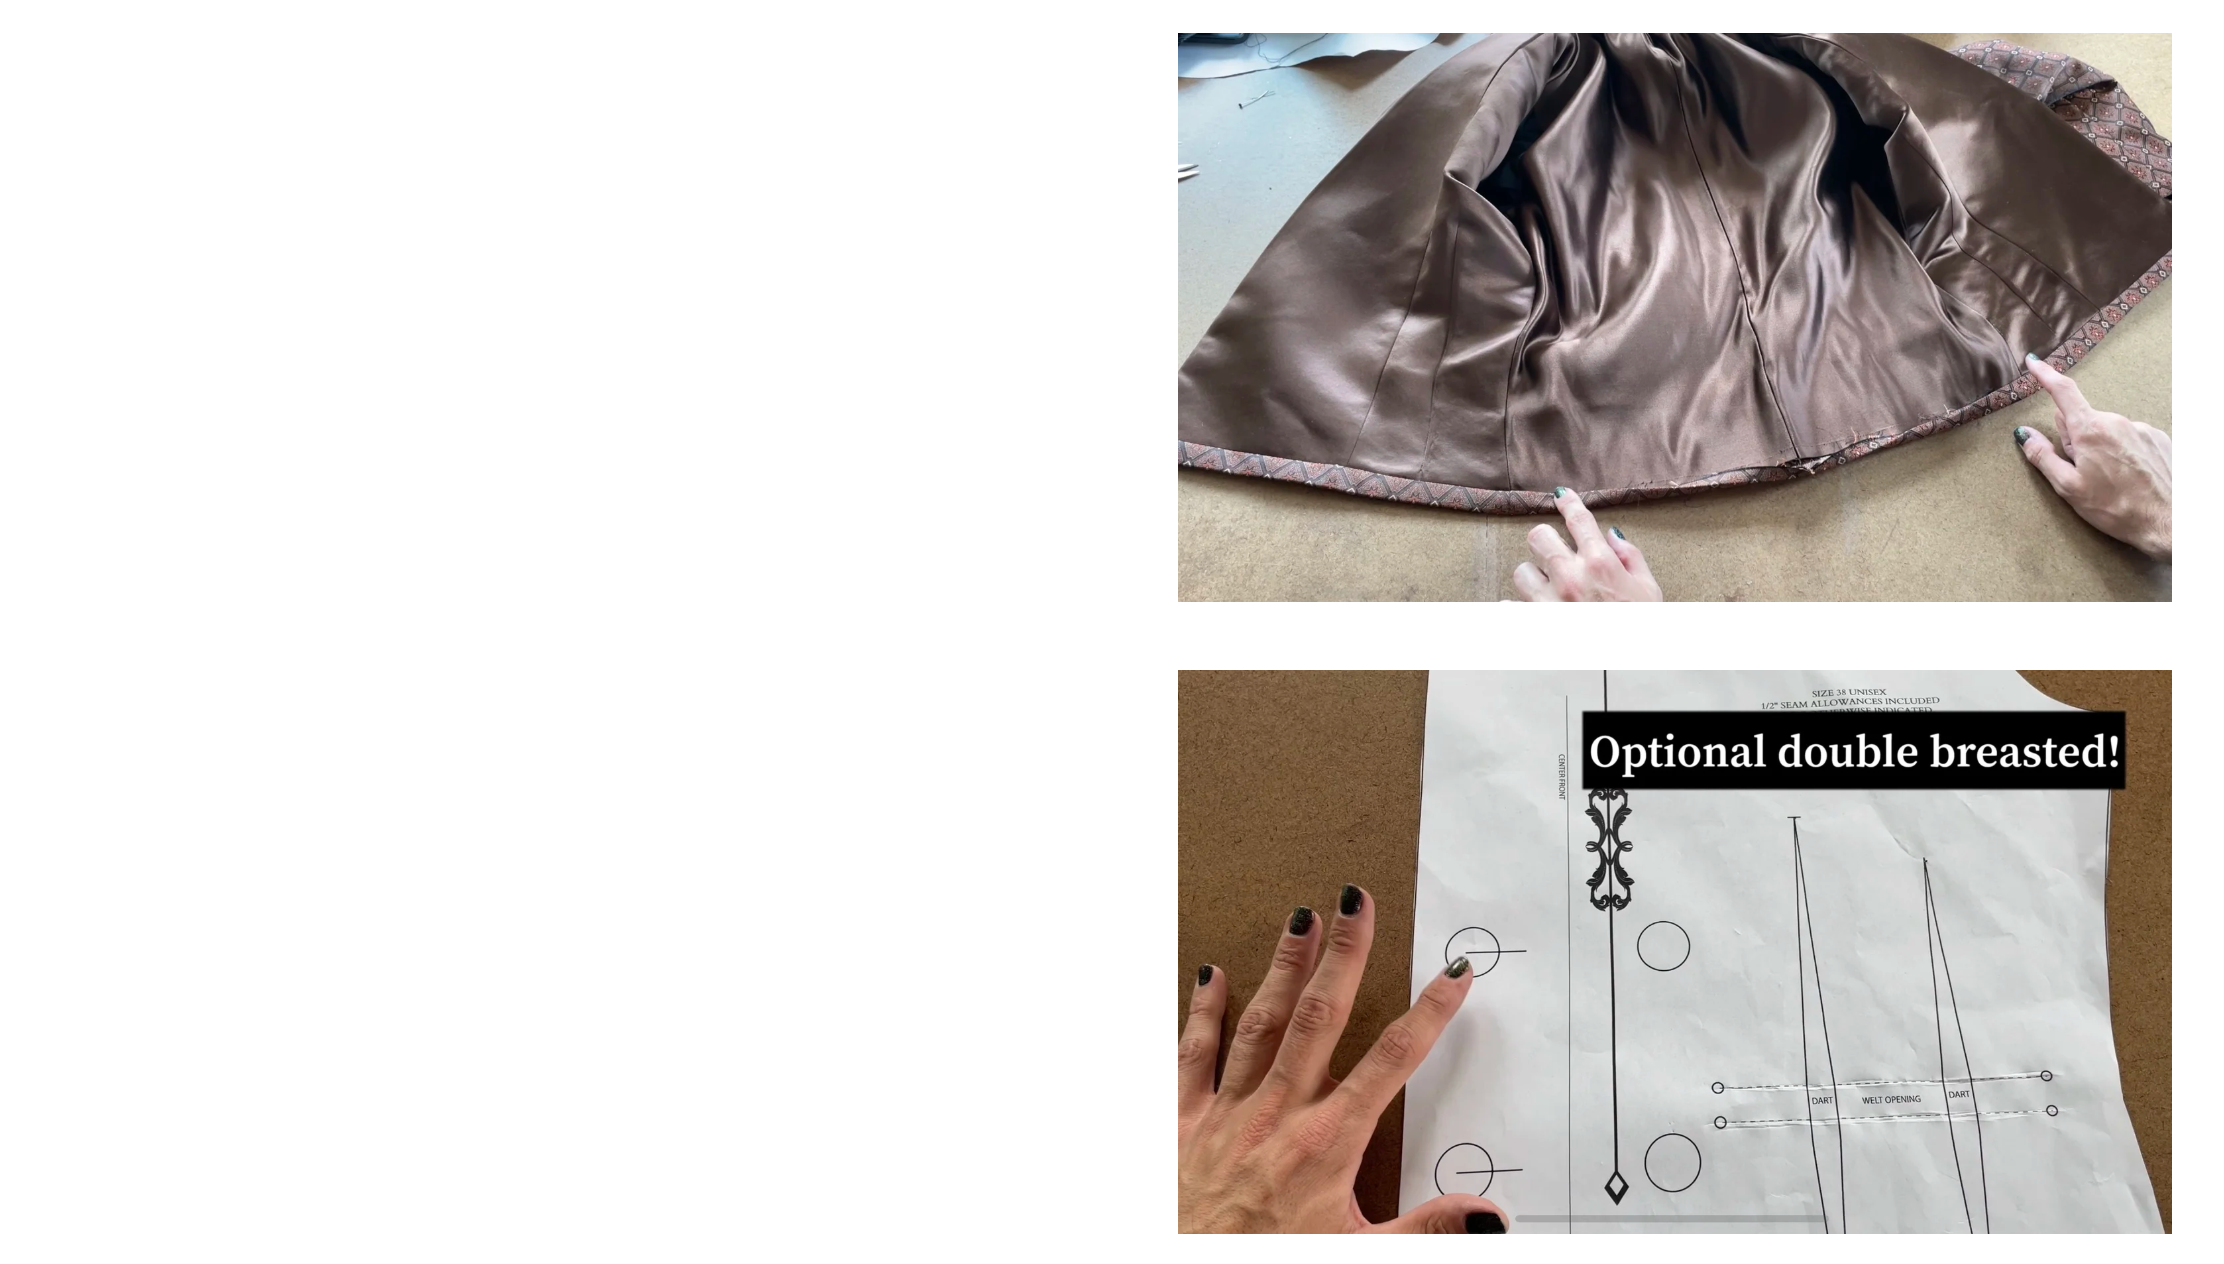
The Viper Blazer Sewing Pattern Guide

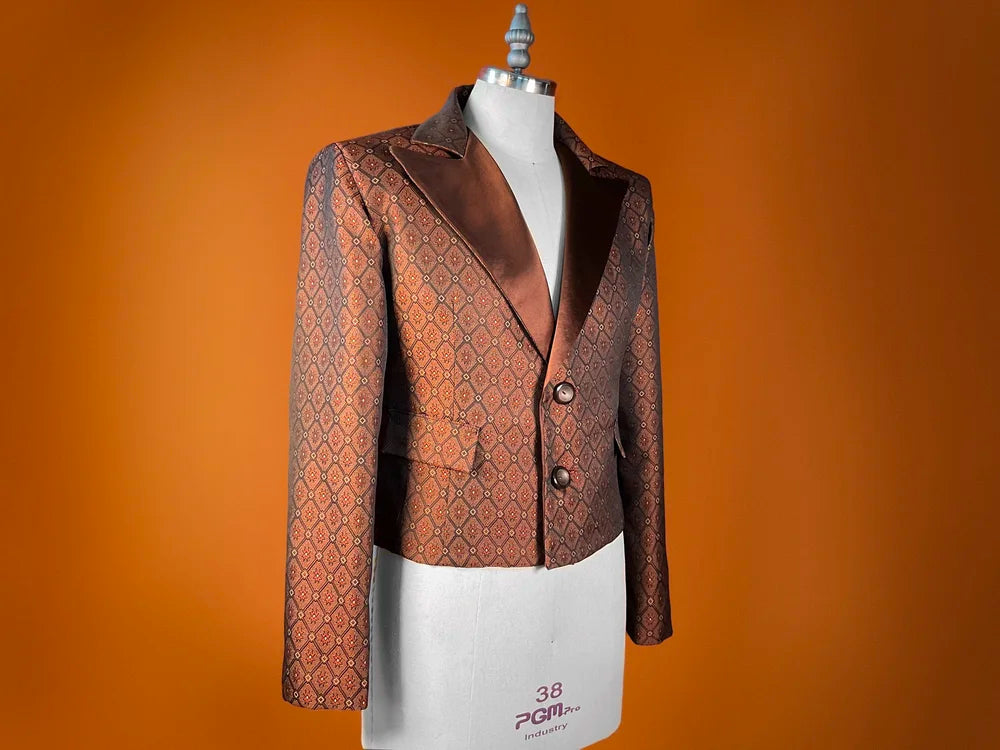
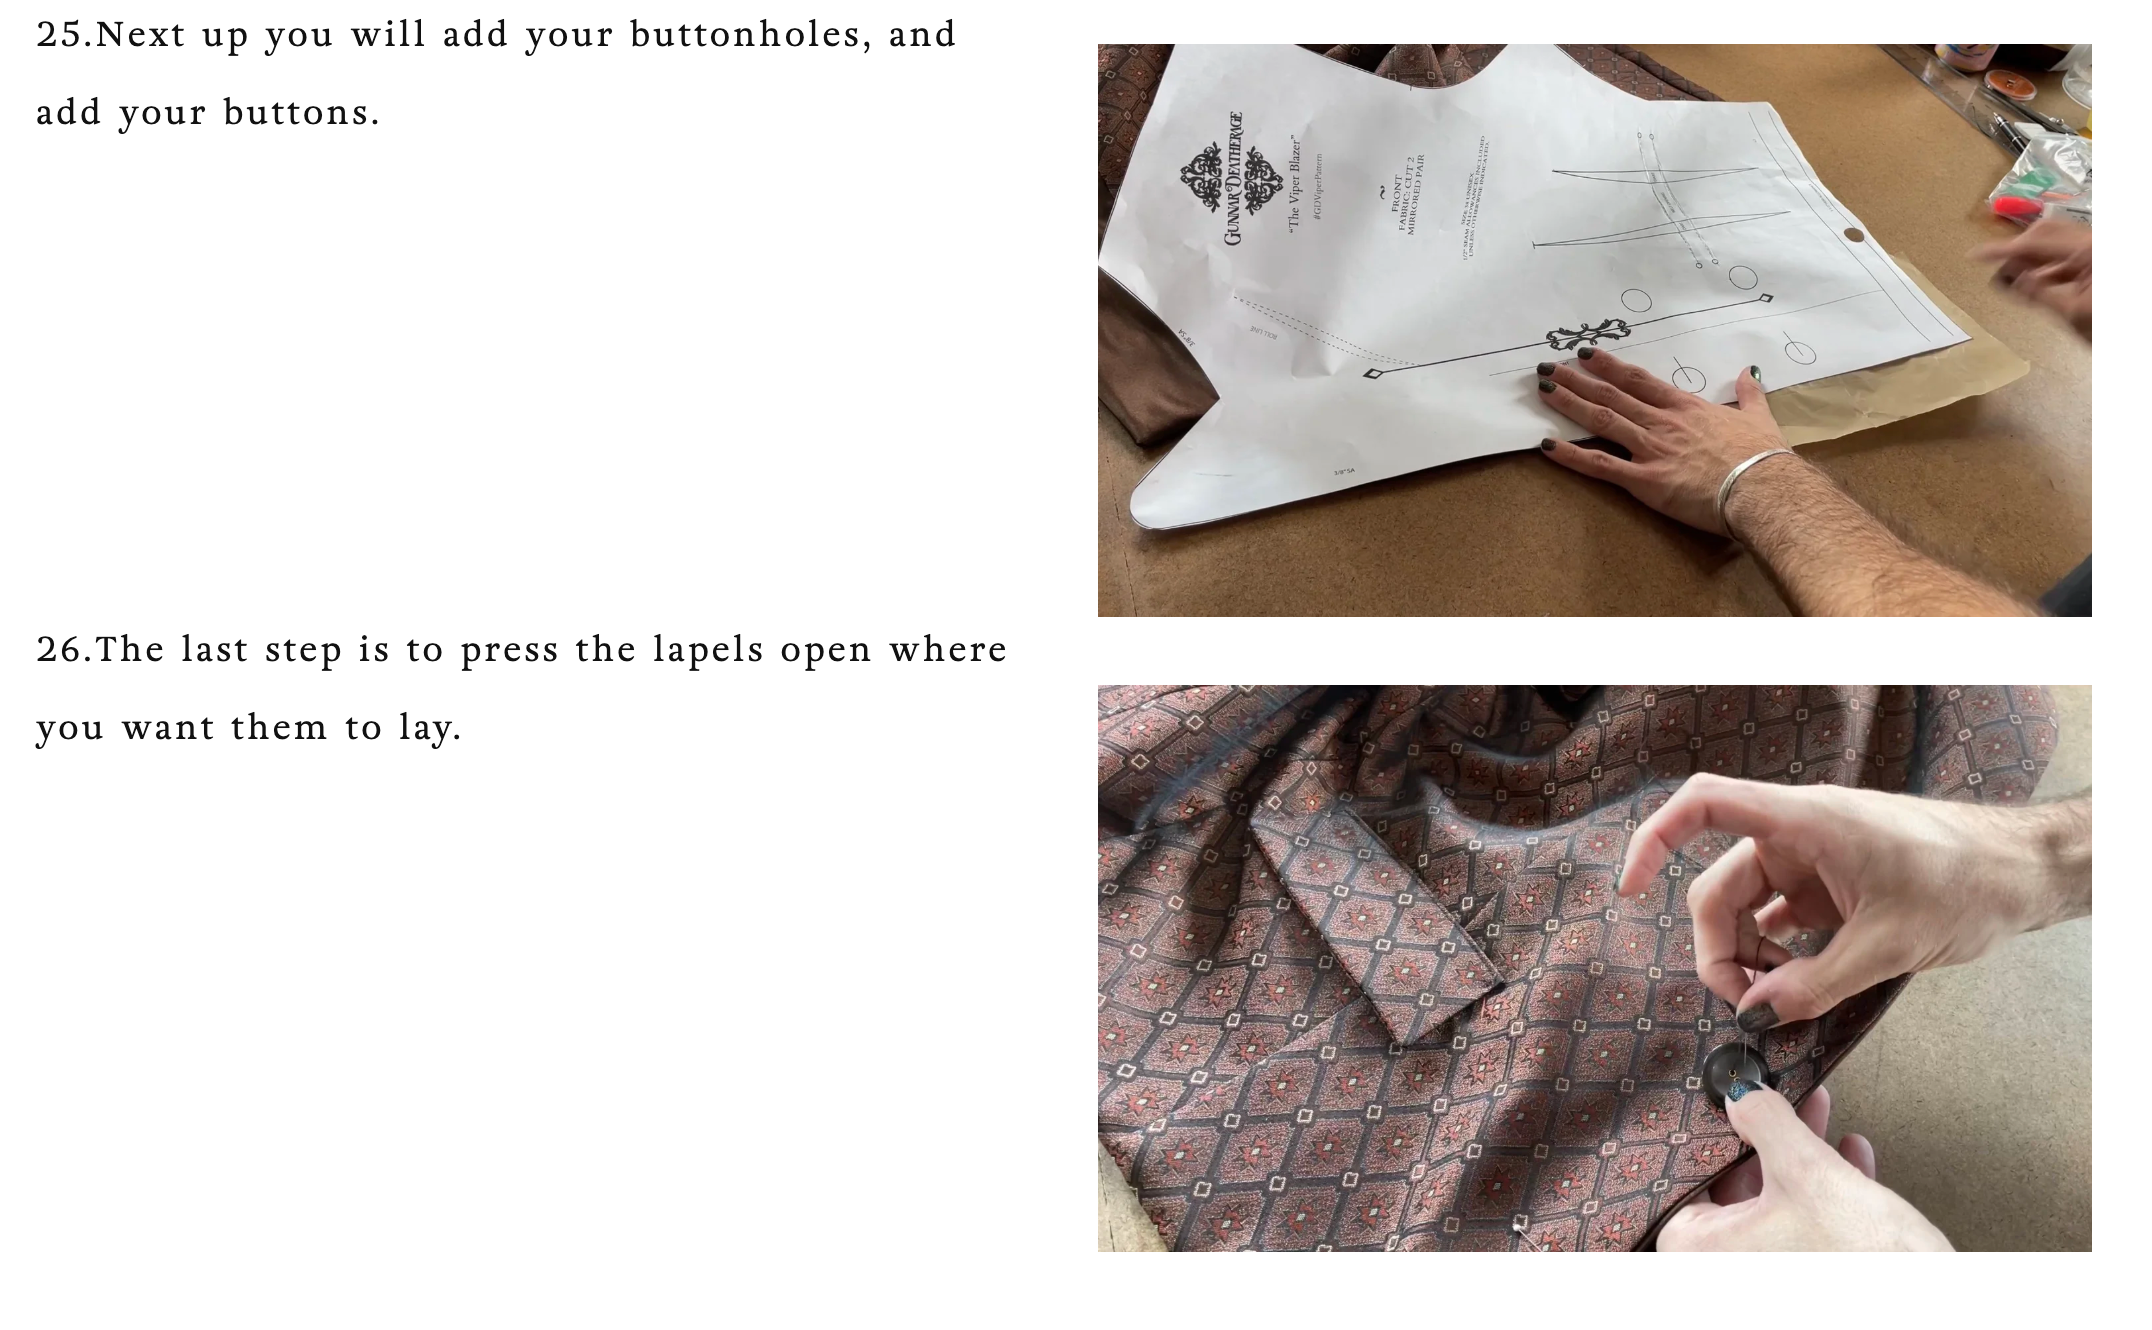
Hello, and welcome to the Viper Blazer! This blazer is beginner friendly for those wanting to venture into the world of tailoring. This blazer is cropped a bit shorter than a traditional blazer with an extended lapel that has a very 1970s feel. The lapel and length of the blazer could both be altered with a little tweaking but the pattern acts as a great base. The blazer is designed to be double-breasted but could also be made single-breasted, like the sample made in the instructions. If you intend on making yourself a double-breasted, I would go a size up, but if you like a single-breasted, stay at your current size. As always I HIGHLY suggest making a cotton Muslin mock-up! Blazers can be tricky and you want to make sure you have the right size for you.

The pattern will have a cutting layout, and a list of fabrics and notions needed. If you like a shoulder pad ( this blazer looks great with one) I suggest purchasing one that has a little more structure.


Please also take note of the seam allowances on each pattern piece as they are slightly different for each piece.

Now, let’s familiarize ourselves with the pattern! 


This pattern has 12 pattern pieces and they are as follows

A-upper collar

B-Under Collar

C-Front

D-Back

E-Sleeve

F- Front Facing

G-Side Front Lining

H-Back Lining

I-Pocket Welt

J-Pocket Flap

K-Pocket Lining

L-Welt Opening


To start, you will need to decide whether you want to utilize the darts on the front and back pieces of the blazer. The darts are technically optional but do have a significant function. For a more fitted feeling, you could stitch the 4 darts across the back, and the 4 across the front. You could also optionally just stitch two darts on the back, and the two on the front. This will give a semi- fitted feeling. For a loose fit, I suggest not using any of the darts.


1.If you are going to create darts, now would be the time to do so. To create these darts you will need to mark on the back side of the front and back pieces where to stitch the darts. To do this. I like to use a piece of tracing paper and a tracing wheel. If you don’t have tracing paper, try using some chalk, or tailor chalk, and rub it on a piece of parchment paper. This should do a similar job! Place the tracing paper in between the pattern and the fabric with the chalky side facing towards the fabric. Now use your tracing wheel over the darts.

2.After tracing your darts, you will pinch the two dart lines together, and pin them. Now stitch the darts making sure to taper the ends so they don’t end abruptly, as this will create a point on the outside of the blazer.


3.Now let’s work on our welt pocket. Before we hop in, please note that if you choose not to add the darts in the front, you’ll need to position the welt opening and fusible in the center of the welt area. You will have an extra half an inch on each side of the " welt opening" piece. This is because the darts reduce the area on the front of the jacket, so if you aren’t utilizing them, there will be a little extra fabric.


4.We will need to mark the welt openings on the wrong and right sides of the front piece. After marking, apply your interfacing to the wrong side. For this, I’m using a medium-weight fusible. Next, we will pin the welt opening to the right side of the front. Make sure the right sides are facing, the lines marked are matching up, and then pin in place. I’m going to use a little tailor's chalk to connect the lines at the end because we are going to be stitching a perfect rectangle using our lines as guides. Stitch your rectangle.


5.I’m going to mark a line down the center of the rectangle and also going to create these little lines that are diagonal facing. It should look a little like an envelope. These will be my cut lines. Now cut the line down the center and then snip towards the corners of the rectangle we stitched. Get close but make sure not to cut into the rectangle.


6.Now we can flip the welt opening to the wrong side of the front piece, and then iron flat. Take your time and make this rectangle nice and clean. Now repeat these steps to the other front piece.


7.Now we can attach our pocket lining to the welt opening. With right sides facing, pin the top and bottom of the pocket lining to the top and bottom of the welt opening. Now stitch. After stitching I’m going to lay my piece flat on the table, and position the pocket lining where it will lay. Now I’m going to press a crease into the pocket lining. This will allow it to lay flat. After pressing, you can fold the front over a bit to see the line where we will stitch the sides of the pocket lining closed. Pin the sides of the pocket lining, and then stitch it closed making sure to get close to where we had cut the welt opening. This will make sure that we enclose the entire pocket lining. The last step is to press it open nice and flat from the front. Repeat this to the other side of the front.


8.Now let’s add the flap to the pocket. You should have cut 4 pocket flaps and 2 interfacings. After you fuse the interfacings to the back of 2 of the flap pieces, let’s stitch the flap pieces together. With the right sides facing, stitch 3 of the sides together. Please note that the seam allowance here is 3/8". After stitching around the edges, trim the seam allowance, and turn the right side out. Then press. I’m not going to overlock along the top of the piece to close it in. This isn’t necessary, but I think it feels very polished. You could easily just zigzag over that edge. After you’ve close the top edge of the flap, press the seam allowance down and then pin the flap to the front of the jacket. Once you have it pinned in place, stitch the seam allowance to the jacket front. By just stitching the seam allowance, it leaves a nice clean edge. Afterward, you can add two stitches to the top sides to secure the flap down, but this is optional. Now repeat these steps to the other side of the front so both sides have the pocket.


9.Now let’s stitch the center back. With right sides facing, pin and then stitch. After stitching, press open. repeat these steps with the "lining back" pieces. While working on the back lining pieces, check out the marker at the top center back. We will be creating two small pleats that face the center back seam. What this will do is give a little ease in the back of the jacket so you can move around freely. Mark the pleat with a pin or a little chalk, and fold it in towards the center back seam. Now press this pleated flat, and then create a stitch on the pleat to hold it in place.


10.Now let’s stitch the front-facing and side-front lining together. With right sides facing, pin and stitch. Afterward, press open.


11.Next up, let’s attach the shoulder seams of the front and the back pieces. Pin the right sides facing, and then stitch and press open. Now repeat with the front-facing/ side front lining and the lining back pieces.


12.Before we stitch the sleeves to the blazer, let’s stitch the darts into the arms. You’ll see the sleeve has the darts marked.

13.Now that our shoulder seams are intact, let’s stitch the sleeve to the arm hole opening. Begin by pinning with the right sides facing. Make sure the back arm lines up with the back arm of the blazer body. The pattern pieces are marked to indicate this. After pinning stitch. So repeat this to the other side of the blazer, and afterwards, you’ll stitch the sleeve linings the to the lining body


14.The next step is to stitch the side seams. We will be doing one long stitch from the sleeve to the Side of the blazer. With the right sides facing, pin the arm and side of the blazer together. After pinning, stitch together. Now repeat on the other side. After both sides are finished, you will also stitch the lining the same way.


15.Next up, let’s work on the collar. To start we need to stitch the two pieces of the under collar together. Pin with right sides facing, and then stitch. Afterward, press open. Now let’s attach the upper and under collar together. Pin with right sides facing, and stitch three of the sides together starting with the short side, and working your way up to the straight side of the collar, and down on the other short side. Afterward, trim away seam allowance and then turn right side out and press. Make sure to press the points out. Please note that the seam allowance for the center of the under collar is 1/2" but the rest of the seam allowances around the outside edges are 3/8"


16.You’ll notice the under collar is a tad bit shorter, and you will have also seen that we cut it on the bias. This is because when it’s sewn together, it pulls the upper collar down a bit encouraging it to fold, which is what happens on the collar.


17.Now it’s time to pin the collar into the neckline. Match the collar center to the center back seam, and pin across.


18.Let’s pin the lining to the outer blazer at the bottom edge. We’re starting here because the lining is a little shorter, so it will pull the outer edge up inward toward the lining once it’s attached at the neckline. You will be leaving at a 9-10" gap in the middle of the bottom as this will be our access point to turn the blazer right side out. So stitch from one side to your stopping point, and then start at the other stopping point and work your way to the other edge. This will leave you an opening.


19.Now let’s start pinning the lining to the outer shell at the top. We’re going to match the points and pin from there. If you work your way down, you’ll see that the outer layer folds over where we stitched the bottom together. Pinch that fabric and pin. We want to stitch over it. We will start stitching at the bottom and working our way towards the point of the lapel. You can either choose to have a rounded or pointed lapel point. Now let’s stitch the lining to the outer shell starting at the bottom of one side, and working our way up to the point of the lapel, around the neckline, and over the other lapel, down the other side of the blazer.


20.Now is the perfect time to add in those shoulder pads. I add a few hand tacks once I have the hem positioned to the seam allowance of the shoulder seam.


21.Now turn the blazer right side out from the opening we left at the bottom.


22.Now is a great time to press the seams flat, and get a crisp edge.


23.Let’s attach the sleeve to the sleeve lining. If you haven’t done this before, I highly suggest checking out the video tutorial for his, as I explain the process in detail. While the jacket is right side out, and the lining sleeve is pushed into the sleeve, attach the side seams of the sleeve and sleeve lining and pin. This helps us from twisting he sleeve. Now pull the sleeve and sleeve longing out from the opening w elect at the bottom of the blazer, and pin the sleeve to sleeve lining with right sides facing and stitch. After stitching, pull the sleeve right side out and press. Now repeat with the other sleeve.


24.Now it’s time to close up the bottom opening. Pin the seam allowance towards the lining, and then hand sew the opening closed.


25.Next up you will add your buttonholes, and add your buttons.


26.The last step is to press the lapels open where you want them to lay.